
Ankle Sprain (MSK)
Sprained Ankle
What is a Sprained Ankle?
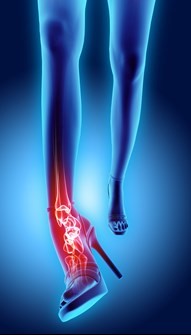
A “sprained ankle” is an injury that occurs when you have turned your ankle into an awkward position. This quick movement can over stretch or tear the ligaments and tendons of your ankle causing pain and swelling.
In the body a ligament helps to stabilise a joint by preventing excessive movement. However, during the activity that has caused your “sprained ankle” the ligaments and tendons are forced beyond their normal range of movement causing an injury to these tissues in the foot and ankle.
Treatment for a sprained ankle depends on the severity of the injury and can take several months to recover.
Ankle Anatomy
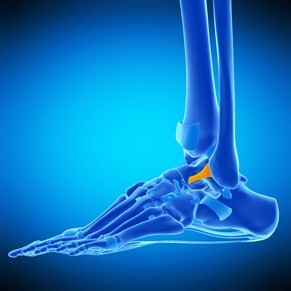
Picture 1: Location of the Anterior Talofibular Ligament
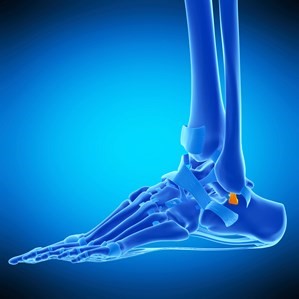
Picture 2: Location of the Calcaneofibular Ligament
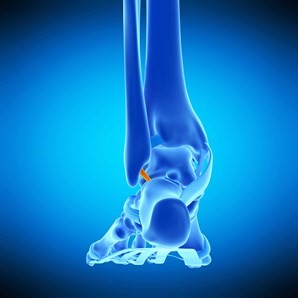
Picture 3: Location of the Posterior Talofibular Ligament
What are the symptoms of a Sprained Ankle?
Signs and symptoms of a sprained ankle can vary from person-to-person and depends on the severity of the injury. They may include:
- Pain, especially when you are putting weight into the affected foot
- Tenderness when you touch the ankle or foot
- Swelling
- Bruising
- Reduced range of movement in your ankle and foot compared to the other side
- Reduced power
- Feeling of giving-way
- Reduced ability to balance on the injured leg
- A ‘popping’ noise or sensation at the time of injury
What can Cause a Sprained Ankle?
A sprained ankle occurs when your ankle is forced into a position that can cause one or more of the ankle ligaments to stretch, partially tear or in very rare occasions rupture.
Causes of a sprained ankle may include:
- A fall that causes your ankle to twist under your body weight
- Landing with your foot inwards or outwards after jumping, pivoting or twisting
- Walking or exercising on an uneven surface
- Another person stepping or landing on your foot during a sports activity
What can increase my risk of spraining my ankle?
Unfortunately 1 in 5 people suffer from a further ankle sprain within the first 12 months
Factors that increase your risk of a sprained ankle include:
- Previous Ankle Injury or Sprained Ankle
- Reduced ankle muscle power
- Reduced ankle muscle flexibility
- Walking or running on uneven surfaces
- Wet surfaces
- Icy surfaces
- Sports that require jumping, change of direction, tackling or kicking
- Shoes that don’t fit properly or aren’t appropriate for the task
- High heels – make ankle more vulnerable to injury
Are there any Complications Following a Sprained Ankle?
Failing to treat a sprained ankle properly or starting activities too soon after injury can result in further sprains. This can lead to the following issues:
- Persistent Ankle Pain
- Persistent Ankle Joint Instability (a feeling of continual weakness)
- Arthritis in the ankle joint
How long will a Sprained Ankle Take to Heal?
Most sprains heal without any problems and usually take 6 to 12 weeks to heal. However, in some occasions it may take 6 to 12 months for your symptoms to settle completely.
Healing rates can take longer if you have an underlying health condition such as diabetes or if you consume too much alcohol or smoke.
How Can I prevent a Sprained Ankle?
The following tips can help you prevent a sprained ankle or further injury:
- Warm up before you exercise or play sports.
- Be careful when walking, running or working on an uneven surface when recovering from the initial injury.
- Wear shoes that fit well and are made for your activity.
- Minimise wearing high-heeled shoes.
- Don’t play sports or participate in activities for which you are not conditioned.
- Maintain good muscle strength and flexibility.
- Practice balance exercises.
What Can I Do for my Sprained Ankle?
Treatment options often depend on the severity of your symptoms.
Changes in lifestyle and modifying your activity can reduce the symptoms. The one person who can help you manage your symptoms is you!
Ice
Can be beneficial in the first 2-3 days following injury. Some people find that putting a bag of frozen peas wrapped in a towel and placed on the injured ankle for 20 minutes every 2 hours whilst you are awake can help with pain.
However, some people do find benefit regularly icing the injured area for several weeks following the injury.
Elevating your Ankle
It is recommended to elevate your ankle above the level of your heart for 20 minutes every 2 hours to help reduce the swelling.
The best position is to lie flat and have your injured ankle resting on a few pillows to lift the leg so that your foot is above your heart. This position will allow gravity to reduce swelling by creating a gradient to drain the excess fluid in your leg.
It can also be helpful to adopt this position at night whilst you sleep that in turn may make your ankle feel less stiff in the morning
Compression
A fabric Tubi-grip bandage can also be used in the early stages of your management to help reduce the swelling created by the injury. This is provided for comfort but will not aid healing on its own.
The compression bandage should only be used until the swelling stops. After the swelling stops it is not recommended to continue with the support because it can weaken the muscles of your foot and ankle causing delays in your recovery.
If the compression bandage feels too tight then remove and do not wear.
If the compression bandage does not relieve any symptoms or causes an increase in pain then remove and do not wear.
Painkillers
A range of different medications may be available to help reduce your pain to allow you to move more comfortably. Do not exceed the daily allowance of these medicines even if your pain is high and always consult a health professional prior to taking any new medication. If you are unsure of what medication you can take, speak with your local pharmacist, practice nurse or GP for guidance.
It is important that if you are prescribed medication that you take them regularly and at the recommended dose (see medication packet for details). All medicines can cause side-effects, particularly if they are not used as prescribed. Side-effects range from common to uncommon and vary from person to person. Information on possible side-effects are available on the leaflet inside the packaging of your medication. It is important to speak to your local pharmacist, practice nurse or GP who may be able to change the dose or the medication itself to something that is more suitable.
You should try and use the prescribed medication regularly at the recommend dose as prescribed. Some medicines can take a number of weeks to have significant effect, however this is dependent on the person. It is best to speak again with your GP or pharmacist about what other options are available if you don’t feel your medicines are helping.
Moonboot
You may have been given a removable boot (Moonboot) to wear to support your ankle. This should be used for 2-6 weeks, depending on the advice given by your consultant or physiotherapist. This boot will enable you to walk more comfortably whilst the injury heals.
You can remove the supportive boot when resting, at night and when bathing or showering. You can put your weight through the injured ankle whilst it is in the boot. However, your consultant or therapist will tell how much weight you are allowed to put through the injured ankle.
If you were given crutches then please use these until your pain allows you to walk without assistance.
Walking
Ankle Ligaments do not take any weight when your foot is flat on the ground. A sprain will not be made worse by walking.
There is no need to fully rest the ankle until you completely recover. Therefore it is advised when walking to keep your foot in the normal walking position. However, you may still need elbow crutches to be able to do this in the early stages of your recovery.
DO NOT walk on your toes, or side of the foot and DO NOT hold your knee or ankle stiff to walk.
Walk around as much as you like but walk normally and initially stay on flat, solid ground. It is easy to lose your balance after a sprain so avoid soft or uneven ground such as grass, stone chips, cobblestone or sand.
After longer periods of walking you may need to ice the ankle to reduce any increases in swelling.
Stairs
When climbing stairs you may need to consider using handrails and go up one leg at time until your muscles become stronger. It is better to go upstairs leading with the non-painful leg one step at a time.
If coming down the stairs then lead with the sore leg one step at a time and use the handrail.
Pacing
If you are in pain don’t tackle all your activities of daily living, such has housework, at once. Break the harder jobs down into smaller time frames and do something gentler in between. Sometimes a short rest when your ankle starts to feel painful can be helpful over the course of a day.
It is recommended to pace rather than to fully stop all forms of movement or exercise. You may find that taking simple painkillers as previously mentioned may help you to keep active
Exercises
Targeted strengthening and stretching exercises for the muscles in your foot and ankle can help aid your recovery.
Local NHS Ayrshire & Arran physiotherapists have devised exercise clips to help with your symptoms.
Before undertaking the suggested exercises please review our disclaimer.
Driving
If you have injured your foot or ankle you should not drive until you can operate the foot pedals of the vehicle without any pain.
DO NOT operate any car, vehicle or machinery whilst your ankle is in a moonboot.
Work
A Return to work is dependent on your occupation and the duties you need to be able to perform safely and comfortably.
If you need a Fit Note for absence from work then please discuss this further with your GP (doctor).
Sports/Leisure
Do not do any sport for at least 4-8 weeks. However, depending on the severity of the injury this may take several months until you can move your ankle normally.
On returning to your sport or leisure activity it is recommended to gradually increase your training, following similar advice to the pacing section that was previously discussed.
Weight Management
Carrying additional weight can place extra strain on the tissues of your feet and ankles. Losing even a small amount of weight can help reduce the strain on your joints when walking, running or going up and downstairs.
If you need help with weight-control, go to our Self Management External Sources to access our weight management pages where you can find information, advice and groups you can join to help you manage your weight better.
Follow this link to an NHS BMI Calculator to guide you on whether you should consider weight management
Reduce/Quit Smoking
It is thought smoking could interfere with the blood blow to the ligaments during the healing. If circulation is poor, tendons may take longer to heal or may not heal well.
During your recovery it is recommended to either stop smoking or reduce the number you are smoking
You can find help to reduce or quit smoking.
Ankle Sprain Exercises
The exercises in the videos below have been provided to help with your ankle pain. If there is any doubt about your fitness to do these exercises then please discuss this with your GP.
You may find that these exercises may slightly increase your symptoms initially. However you should find that the exercises themselves will become easier to do and that you begin to move your ankle more easily. These exercises can take up around 12 weeks for you to notice a great improvement.
If the exercises do cause some discomfort then taking prescribed medication from your GP or pharmacist may help you to continue to exercise.
If these exercises cause a large increase in your pain or after 12 weeks there are no noticeable changes in your day to day symptoms then please contact your GP or NHS Inform for more advice.
Disclaimer
Please note: These exercises should not be used without prior consultation with a medical professional as the use of the wrong exercise may cause additional health related issues and discomfort. NHS Ayrshire & Arran and MSK NHS Ayrshire & Arran are not liable or responsible for any harm, losses or damages whatsoever resulting from the use or misuse of the information contained in or implied by the provided information in each video. These are provided for information only.
If you have any concerns about your ability to perform exercise then please discuss your concerns with your doctor or healthcare provider prior to participating in any advice that is on the MSK NHS Ayrshire & Arran website.
It is recommended to use your ice pack (cryocuff) or cool pack after your exercises to reduce the pain and discomfort this may cause.
Please choose the most relevant exercise section for you.
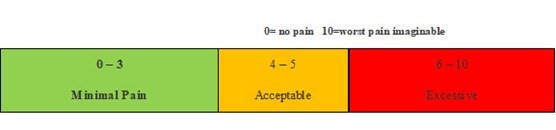
The guide below will help ensure you are working at the right level:
Pain during exercise
Aim to stay in the green or amber boxes. If you are in the red area then you can modify the exercises by trying reducing the amount of movement during an exercise, the number of repetition, reducing the weights, reducing your speed or increasing rest time between sets.
Pain After Exercise
Your pain or other symptoms should return to your pre exercise baseline within 30 minutes of exercising. You should not feel an increase in pain or stiffness that last longer than 60minutes the next morning after your exercises.
Choosing the most relevant exercise section for you
- Exercising after an acute injury
- Exercising when your pain is severe.
- Exercising when your pain has started to settle and you are ready to progress to strengthening exercises
Section 1 – Mobility Exercises
If you have had an acute injury and this is associated with a sudden loss of movement, it is important that you seek health care advice.
These exercises are helpful initially to help restore movement to your ankle. When these become too easy you can progress to the next section if your ankle does not fully recover.
During the early stages of your injury it is important to gently start moving the ankle to help reduce pain and prevent the ankle stiffening whilst you recover.
Exercise 1 – Ankle Rotations
Ankle Rotations – YouTube

Ankle rotations are important to help maintain and improve your range of movement after an ankle sprain. You can do this exercise in either sitting or lying.
To do this exercise – start by slowly turning your ankle to the left and draw circles with your foot as pain allows. Repeat this for 20-30 repetitions. Then slowly turn your ankle to the right and draw circles with your foot as pain allows. Repeat for 20-30 repetitions.
Do this exercise every 2 hours as pain allows.
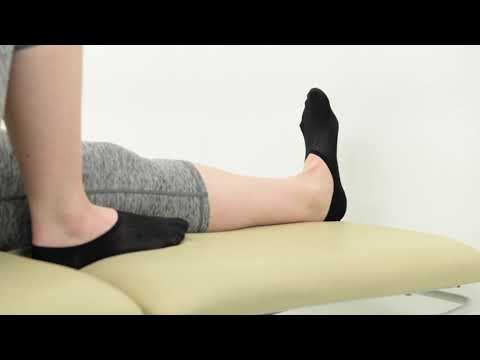
Exercise 2 – Ankle Active Plantarflexion and Dorsiflexion
Ankle Rotation Plantarflextion – YouTube
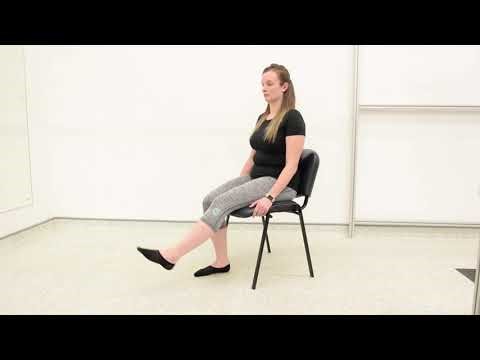
Ankle movements in a forward and backward direction is an important exercise to help maintain and improve your range of movement after an ankle sprain. You can do this exercise in either sitting or lying (SHOW BOTH POSITIONS)
To do this exercise – start by slowly pointing your toes away from you as pain allows. Then slowly pull your toes back up towards you as pain allows. Repeat this 20-30 repetitions.
Do this exercise every 2 hours as pain allows.
Section 2: Stretching Exercises
Stretching the muscles is important to maintain range of movement as you recover from your ankle sprain. It is advised to start this early following your injury in a non-weight bearing position. Then as pain allows it is recommended to continue to stretch in standing.
Exercise 1 – Towel Stretch
Towel Stretch – YouTube
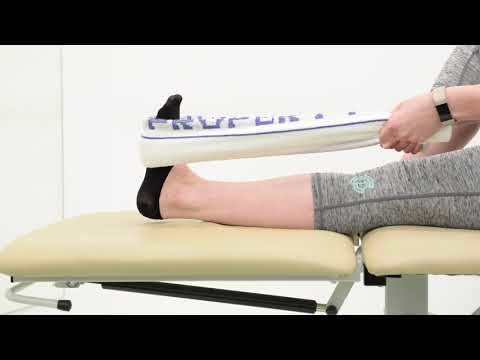
Stretching the muscles is important to maintain range of movement as you recover from your ankle sprain. It is advised to start this early following your injury in a non-weight bearing position.
To do this exercise – sit on the floor or on top of your bed. Place the leg with the injured ankle in front of you and keep the leg straight. Wrap a towel around the ball of your foot, that is just below your toes. Pull back on the towel slightly until you start feeling a stretch at the very bottom of your feet and the back of your lower leg. Aim to hold the stretch for 30 seconds.
Repeat this 3 times 4 times per day.
Exercise 2 – Towel Stretch with Knee Bent
Towel Stretch Knee Bent – YouTube
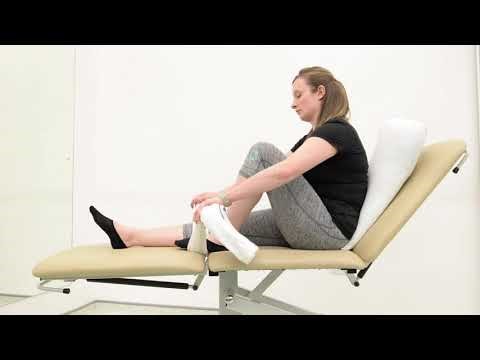
Stretching the muscles is important to maintain range of movement as you recover from your ankle sprain. It is advised to start this early following your injury in a non-weight bearing position. This exercise will create a deeper stretch down the back of your lower leg.
To do this exercise – sit on the floor or on top of your bed. Bend the leg with the injured ankle in front of you with the heel resting on the surface you are performing the exercise on. Wrap a towel around the ball of your foot, this is just below the toes. Pull back on the towel slightly until you start feeling a stretch deep in the back of the lower leg. Aim to hold the stretch for 30 second.
Repeat this 3 times, 4 times per day
Exercise 3 – Standing Calf Stretch
Standing Calf Stretch – YouTube

Once your pain becomes more controlled and you can put more weight into the ankle it is recommended to progress your stretching into a standing position.
To do this exercise – (Part 1) Place you hands on a wall for support and take a step back with the affected foot. It is important that the heel of the affected foot remains on the ground throughout this stretch. Keep the toes of both feet pointing towards the wall. Now begin to bend the knee of your front leg whilst moving your chest towards the wall. You should feel a stretch in the back of your lower leg, hold for 30 seconds
Repeat 3 times, 4 times per day
(Part 2) The second part of this exercise is aimed at stretching the soleus muscle. Adopt the same starting position as you did for the previous exercise. Slide the affected foot towards the front foot as demonstrated. This time when bending the front knee also bend the knee of the back leg until you feel a stretch deeper in the calf muscle. Hold this for 30 seconds
Repeat 3 times. 4 times per day.
Section 3: Isometric Strengthening Exercises
Isometric exercises are a type strength training that causes a gentle static contraction of the muscle.
This is usually the first phase of tendon rehabilitation where this type of exercise can help to reduce your pain if done correctly. These exercises need to be repeated several times a day and slowly increased to 40second holds to reduce pain, maintain some muscle capacity and tendon load.
In highly irritable tendons, shorter holding time may be indicated and can result in this phase taking longer to complete but should be steadily increased to 40 seconds over time.
This phase can take over 4 weeks to achieve before progressing to the next section
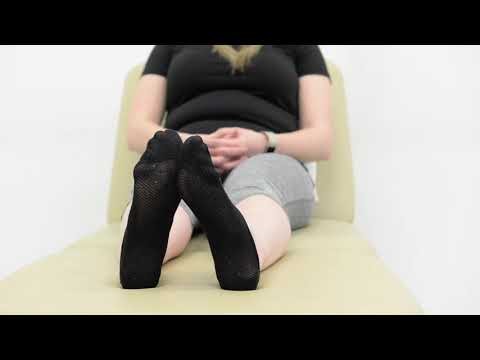
Exercise 1 – Isometric Plantarflexion
Isometric Plantarflexion – YouTube
To do this exercise – sit on the floor or on top of your bed. Place the leg with the injured ankle in front of you and keep the leg straight. Point your toes towards a wall. GENTLY press the ball of your foot against the wall. GENTLY hold this movement for 10 seconds, repeat this 5 times and repeat 3-4 times per day.
Then for the second week – do the same exercise but now gently hold for 20 seconds, repeat 5 times in a row and do this 4 times per day for a week
Then for the third week – do the same exercise but now gently hold for 30 seconds, repeat 5 times in a row and do this 4 times per day for a week
Then for the fourth week – do the same exercise but now gently hold for 40 seconds, repeat 5 times in a row and do this 4 times per day for a week.
**IF YOU FIND THIS EXERCISE INCREASES YOUR PAIN THEN YOU ARE PUSHING TOO HARD SO YOU MAY NEED TO EASE OFF SLIGHTLY**
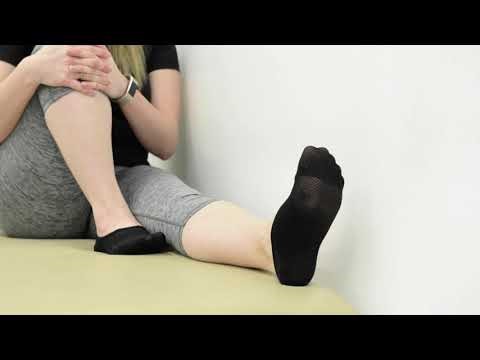
Exercise 2 – Isometric Dorsiflexion
Isometric Dorsiflexion – YouTube
To do this exercise – sit on the floor or on top of your bed. Place the leg with the injured ankle in front of you and keep the leg straight. Pull your foot and toes towards you. Gently press the heel of the other foot just below the toes.
GENTLY hold this movement for 10 seconds, repeat this 5 times and repeat 3-4 times per day.
Then for the second week – do the same exercise but now gently hold for 20 seconds, repeat 5 times in a row and do this 4 times per day for a week
Then for the third week – do the same exercise but now gently hold for 30 seconds, repeat 5 times in a row and do this 4 times per day for a week
Then for the fourth week – do the same exercise but now gently hold for 40 seconds, repeat 5 times in a row and do this 4 times per day for a week.
**IF YOU FIND THIS EXERCISE INCREASES YOUR PAIN THEN YOU ARE PUSHING TOO HARD SO YOU MAY NEED TO EASE OFF SLIGHTLY**
Exercise 3 – Isometric Inversion
Isometric Inversion – YouTube
To do this exercise – sit on the floor or on top of your bed. Place the leg with the injured ankle in front of you and keep the leg straight. Gently push the inside of your sore foot inward against the inside of the other foot. GENTLY hold this movement for 10 seconds, repeat this 5 times and repeat 3-4 times per day.
Then for the second week – do the same exercise but now gently hold for 20 seconds, repeat 5 times in a row and do this 4 times per day for a week
Then for the third week – do the same exercise but now gently hold for 30 seconds, repeat 5 times in a row and do this 4 times per day for a week
Then for the fourth week – do the same exercise but now gently hold for 40 seconds, repeat 5 times in a row and do this 4 times per day for a week.
**IF YOU FIND THIS EXERCISE INCREASES YOUR PAIN THEN YOU ARE PUSHING TOO HARD SO YOU MAY NEED TO EASE OFF SLIGHTLY**
Exercise 4 – Isometric Eversion
Isometric Eversion – YouTube
To do this exercise – sit on the floor or on top of your bed. Place the leg with the injured ankle in front of you and keep the leg straight. Gently push the outside of your sore foot and press against a wall. GENTLY hold this movement for 10 seconds, repeat this 5 times and repeat 3-4 times per day.
Then for the second week – do the same exercise but now gently hold for 20 seconds, repeat 5 times in a row and do this 4 times per day for a week
Then for the third week – do the same exercise but now gently hold for 30 seconds, repeat 5 times in a row and do this 4 times per day for a week
Then for the fourth week – do the same exercise but now gently hold for 40 seconds, repeat 5 times in a row and do this 4 times per day for a week.
**IF YOU FIND THIS EXERCISE INCREASES YOUR PAIN THEN YOU ARE PUSHING TOO HARD SO YOU MAY NEED TO EASE OFF SLIGHTLY**
Section 4: Strengthening Exercises
Once pain has slightly settled you can progress to work on strength. Strength is the ability to produce force and in this context we are aiming to improve the muscle and tendon’s ability to produce force and manage load. Strength is an essential building block for muscle function, without adequate strength muscle will have poor power and endurance.
Exercise 1: Heel Raises
Heel Raises – YouTube
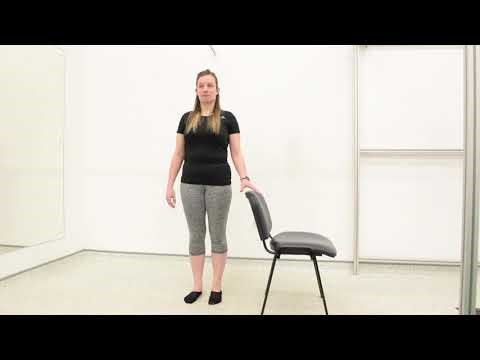
To do this exercise – Stand with your feet about shoulder-width apart. Have a chair or a wall nearby for support if you need it. Lift your heels off the floor so that you’re standing on the balls of your feet. Hold for 3 seconds then slowly lower your heels back down on the floor. Do not rush the exercise – slow and controlled is best.
Do 3 sets of 15 repetitions.
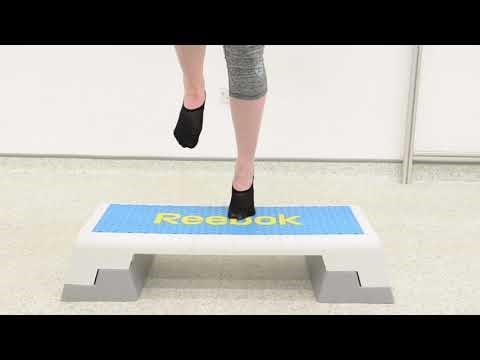
Exercise 2 – Heel Raises Over A Step
Heel Raises Over a Step – YouTube
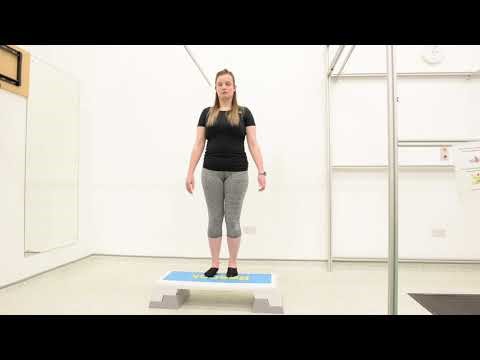
This move is more challenging than the heel lift on the floor because it flexes the ankle more. Therefore only complete once you have achieved 3 sets of 15 repetitions in the heel raise exercise.
To do this exercise – Stand on the bottom step with your weight on the balls of your feet and your heels hanging off the step. Use a banister or wall for support if you need it. Raise up onto the balls of your feet. Hold for 3 seconds and then slowly lower your feet, with your heels dropping below the step level. Slow and controlled is best.
Do 3 sets of 15 repetitions
Exercise 3 – Single Leg Heel Raises
Single Leg Heel Raises – YouTube
This exercise is a progression from the heel raise exercise and should only be done once you have achieved 3 sets of 15 repetitions in heel raises.
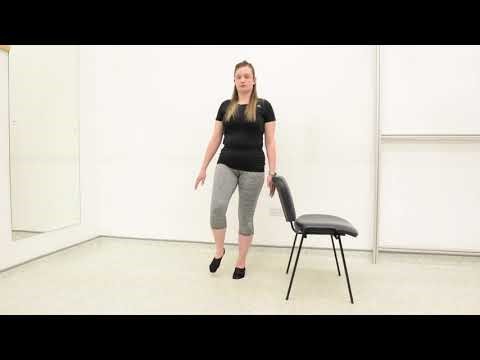
To do this exercise – Stand on your injured ankle. Hold onto the back of the chair or a wall for support. Lift your heel off the floor so that you are standing on the ball of your foot. Hold for 3 seconds then slowly lower your heel back down on the floor. Do not rush the exercise – slow and controlled is best
Do 3 sets of 15 repetitions
Exercise 4 – Single Leg Heel Raises: Over a Step
SL Heel Raises Over a Step – YouTube
This exercise is a progression from the heel raise exercise over a step and should only be done once you have achieved 3 sets of 15 repetitions in the heel raises over a step exercise.
To do this exercise – Stand on the bottom step with your weight on the ball of the foot and your heel hanging off the step of the ankle that has been injured. Use a banister or wall for support if you need it. Raise up onto the ball of your foot. Hold for 3 seconds. Then slowly lower your foot, with your heels dropping below the step level. Slow and controlled is best.
Do 3 sets of 15 repetitions
Exercise 5 – Resistance Band: Plantarflexion
Resistance Band Plantarflexion – YouTube
This move uses a resistance band to strengthen your ankle.
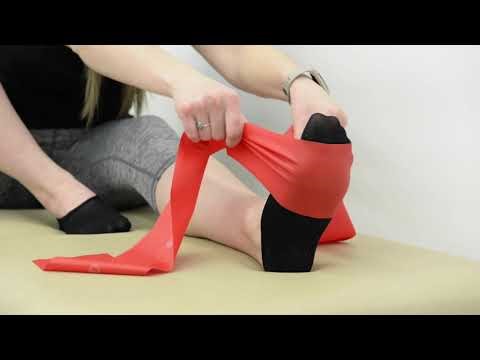
To do this exercise – Sit on the floor or top of your bed with the leg of the injured ankle lying straight and the other leg bent at the knee with the heel on the floor. Loop the band around the ball of your injured foot. Hold both ends of the band with your hands. Point your toes slowly forward and hold for 5 seconds and then slowly release the tension by returning foot to starting position
Do 3 sets of 15 repetitions.
Exercise 6 – Resistance Band: Dorsiflexion
Resistance Band Dorsiflexion – YouTube
This move uses a resistance band to strengthen your ankle.
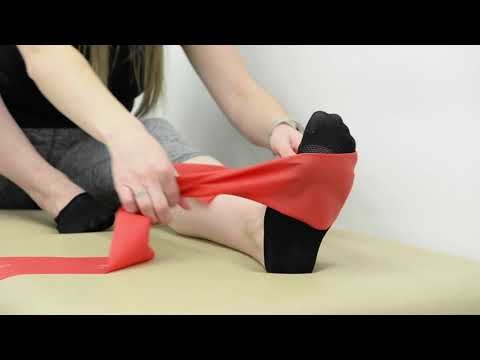
To do this exercise – Sit on the floor or top of your bed with the leg of the injured ankle lying straight and the other leg bent at the knee with the heel on the floor. Secure the band around a chair leg or a table leg. Wrap the band around your injured foot. Slowly pull your toes towards you and hold for 3 seconds, then return to the starting position.
Do 3 sets of 15 repetitions.
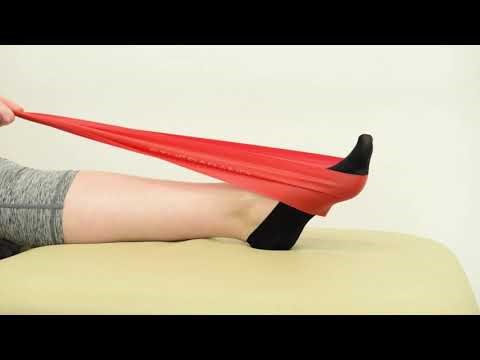
Exercise 7 – Resistance Band: Inversion
Resistance Band Inversion – YouTube
This move uses a resistance band to strengthen your ankle.
To do this exercise – Sit on the floor or top of your bed. Wrap the resistance band round the top of your foot as shown. Slowly move your foot inwards against the band as far as possible. Do not roll the leg inwards at the hip.
Do 3 Sets of 15 repetitions.
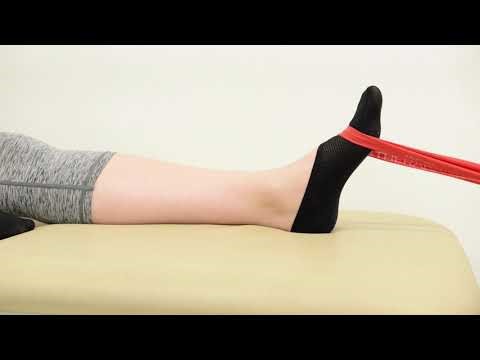
Exercise 8 – Resistance Band: Eversion
Resistance Band Eversion – YouTube
This move uses a resistance band to strengthen your ankle.
To do this exercise – Sit on the floor or top of your bed. Wrap the resistance band around the top of your foot as shown. Slowly move your foot outwards against the resistance band as far as possible. Do not roll your leg outwards at the hip.
Do 3 sets of 15 repetitions.
Section 5: Balance Exercises
After an ankle sprain you may notice that you become unsteady when balancing. Balance exercises will help restore this and is an important part of your recovery.
Exercise 1 – Single Leg Balance
Single Leg Balance – YouTube
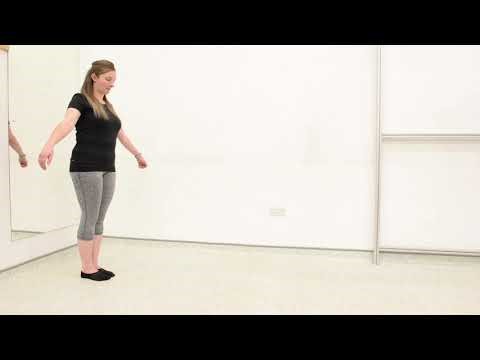
To do this exercise – Stand on a flat surface with your feet shoulder-width apart. Have a chair or wall nearby for support if you need it. Stand on your sore foot and lift your other knee above your waist. Hold this position.
Do this daily, and try to increase the number of seconds you can hold this position. Try and aim for 60 seconds holding onto a chair or wall. Once you are able to do this you can try to balance for 60 seconds without holding on.
A further variation is to balance without support and throwing a ball up and down.
Exercise 2: Heel-to-Toe Walk Exercise
Heel to Toe Walk – YouTube
To do this exercise – Clear the space around you to avoid tripping hazards.
* Keep your eyes facing forwards and not looking at your feet.
* Pretend you’re walking on a tightrope by placing one foot directly in front of the other.
* Do 4 metres and turn
If there are any doubts about your balance prior to conducting this exercise then please discuss with your doctor or therapist prior to attempting.
Exercise 3: Toe Walks
Toe Walk – YouTube
To do this exercise –
* Clear the space around you to avoid tripping hazards.
Keep your eyes facing forwards and not looking at your feet. Go on the balls of each foot and then walk forwards.
Do 4 metres and turn.
If there are any doubts about your balance prior to conducting this exercise then please discuss with your doctor or therapist prior to attempting