Osteoarthritis (OA) is a condition that affects the joints causing pain and stiffness.
It is normal to expect some degree of osteoarthritis as we get older. Between bones, there is cartilage which protects the bones and provides some shock absorption. With osteoarthritis, this cartilage gradually wears away and allows some bone to bone contact.
Over time, this causes bony changes, pain and loss of function at the affected joint.
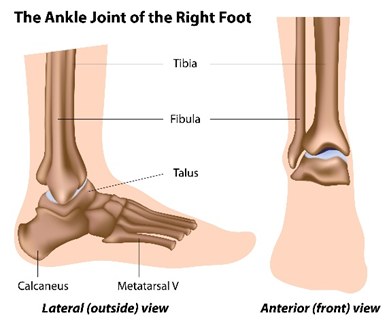
What is ankle osteoarthritis?
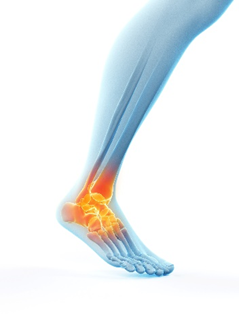
Ankle osteoarthritis occurs when the protective cartilage that cushions the ends of the tibia, fibular and talus wears down over time, leading to bone to bone contact and inflammation. With ankle osteoarthritis it may be uncomfortable to walk and climb stairs due to pain and stiffness with ankle movements. Ankle osteoarthritis can be chronic in which it develops slowly over time, or as a result of trauma or injury.
Ankle osteoarthritis affects approximately 1% of the population. There is a higher incidence of ankle osteoarthritis in women compared with men and is more common in those over 45 years old.
Causes
Approximately 90% of people with ankle arthritis have one of two main risk factors: previous joint trauma or an underlying medical condition. The remainder of people usually have other risk factors, such as family history of osteoarthritis.
Risk factors include:
- Injury: a traumatic injury such as a fracture or a severe ankle sprain can lead to osteoarthritis of the ankle over time.
- Inflammatory Arthritis: The ankle joint can be affected in patients with medical conditions causing inflammatory arthritis, for example rheumatoid arthritis, psoriatic arthritis or gout.
- Infection / Bleeding: Although very rare infection or bleeding within the ankle joint caused by a medical condition can result in ankle arthritis.
- Age: it is more common in older adults, although it can affect any age.
- Obesity: The ankle bears up to 5 times a person’s body weight during walking. If you are overweight this can lead to greater stress and load going through your ankle joint due to the changes in foot mechanics.
- Genetics: if you have a family history of osteoarthritis you may be more at risk of developing ankle arthritis.
Symptoms
The main symptoms of osteoarthritis of the ankle are:
- Pain: worse in the mornings or after periods of activity
- Stiffness: worse in the morning or after periods of rest
- Swelling: one side or across the ankle
- Restricted range of movement: limited movement up or down at the ankle and it can feel / sound like it crunches.
- Giving way of the ankle
- Difficulty with weight bearing activity: due to pain, stiffness and reduced range of movement
How long will it take to get better?
There is no cure for osteoarthritis of the ankle, but there is a lot that you can do to improve your symptoms. Self-help or self-management is very important to relieve pain, stiffness and reduce your chances of your arthritis becoming worse.
What can I do to help my ankle osteoarthritis?
Treatment is aimed at reducing the stress/ load through the affected joint to reduce inflamation and improving strength around the affected joint.
Changes in lifestyle can also be helpful to aid in your recovery. The one person who can help you manage your symptoms is you.
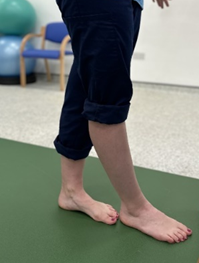
Footwear
One of the most important changes you can make is to your footwear.
- Avoid walking in bare feet
- Avoid high heeled shoes or shoes with a flexible sole as these place increased stress on the joints of the forefoot.
- Avoid very flat shoes
Look for a shoe that has the following qualities;
- Heels should be broad and around 1.5 inches high.
- Soles should be firm and non-pliable.
- Cushioned soles such as running shoes can help with shock absorption
- Deep fitting footwear or boots may provide greater support around your ankle.
- Lacing or Velcro straps to hold the shoe firmly to the foot. E.g. running or walking shoe/boot.
- The forefoot of the shoe should have a small rocker to aid with the walking cycle and reduce pain.
Watch our footwear advice video below, or see our section with further footwear advice.
Topical creams/gels
Applying anti-inflammatory gel across ankle joint can provide some symptomatic relief in the short term.
Weight management
If you have a higher than average body mass index (BMI) you are more at risk. Please see the weight management section of our foot and ankle pain self-help page for further support with managing weight.
Ice
Icing can be beneficial in the first 2-3 days following injury or to help manage any flare ups of pain. Please click here for more advice on how to ice your foot. Some people do find continual benefit of regularly icing for several weeks following the injury.
Activity modification
Avoiding high impact activities and replacing with low impact exercise (e.g. replace running with walking or swimming or cycling)
Strengthening and stretching exercises
Targeted strengthening and stretching exercises for the muscles in and around your foot and ankle can help to improve your symptoms. Local NHS Ayrshire & Arran podiatrists have devised exercise videos to help with strengthening the correct muscles.
See exercise videos at the foot of the page.
Foot orthoses
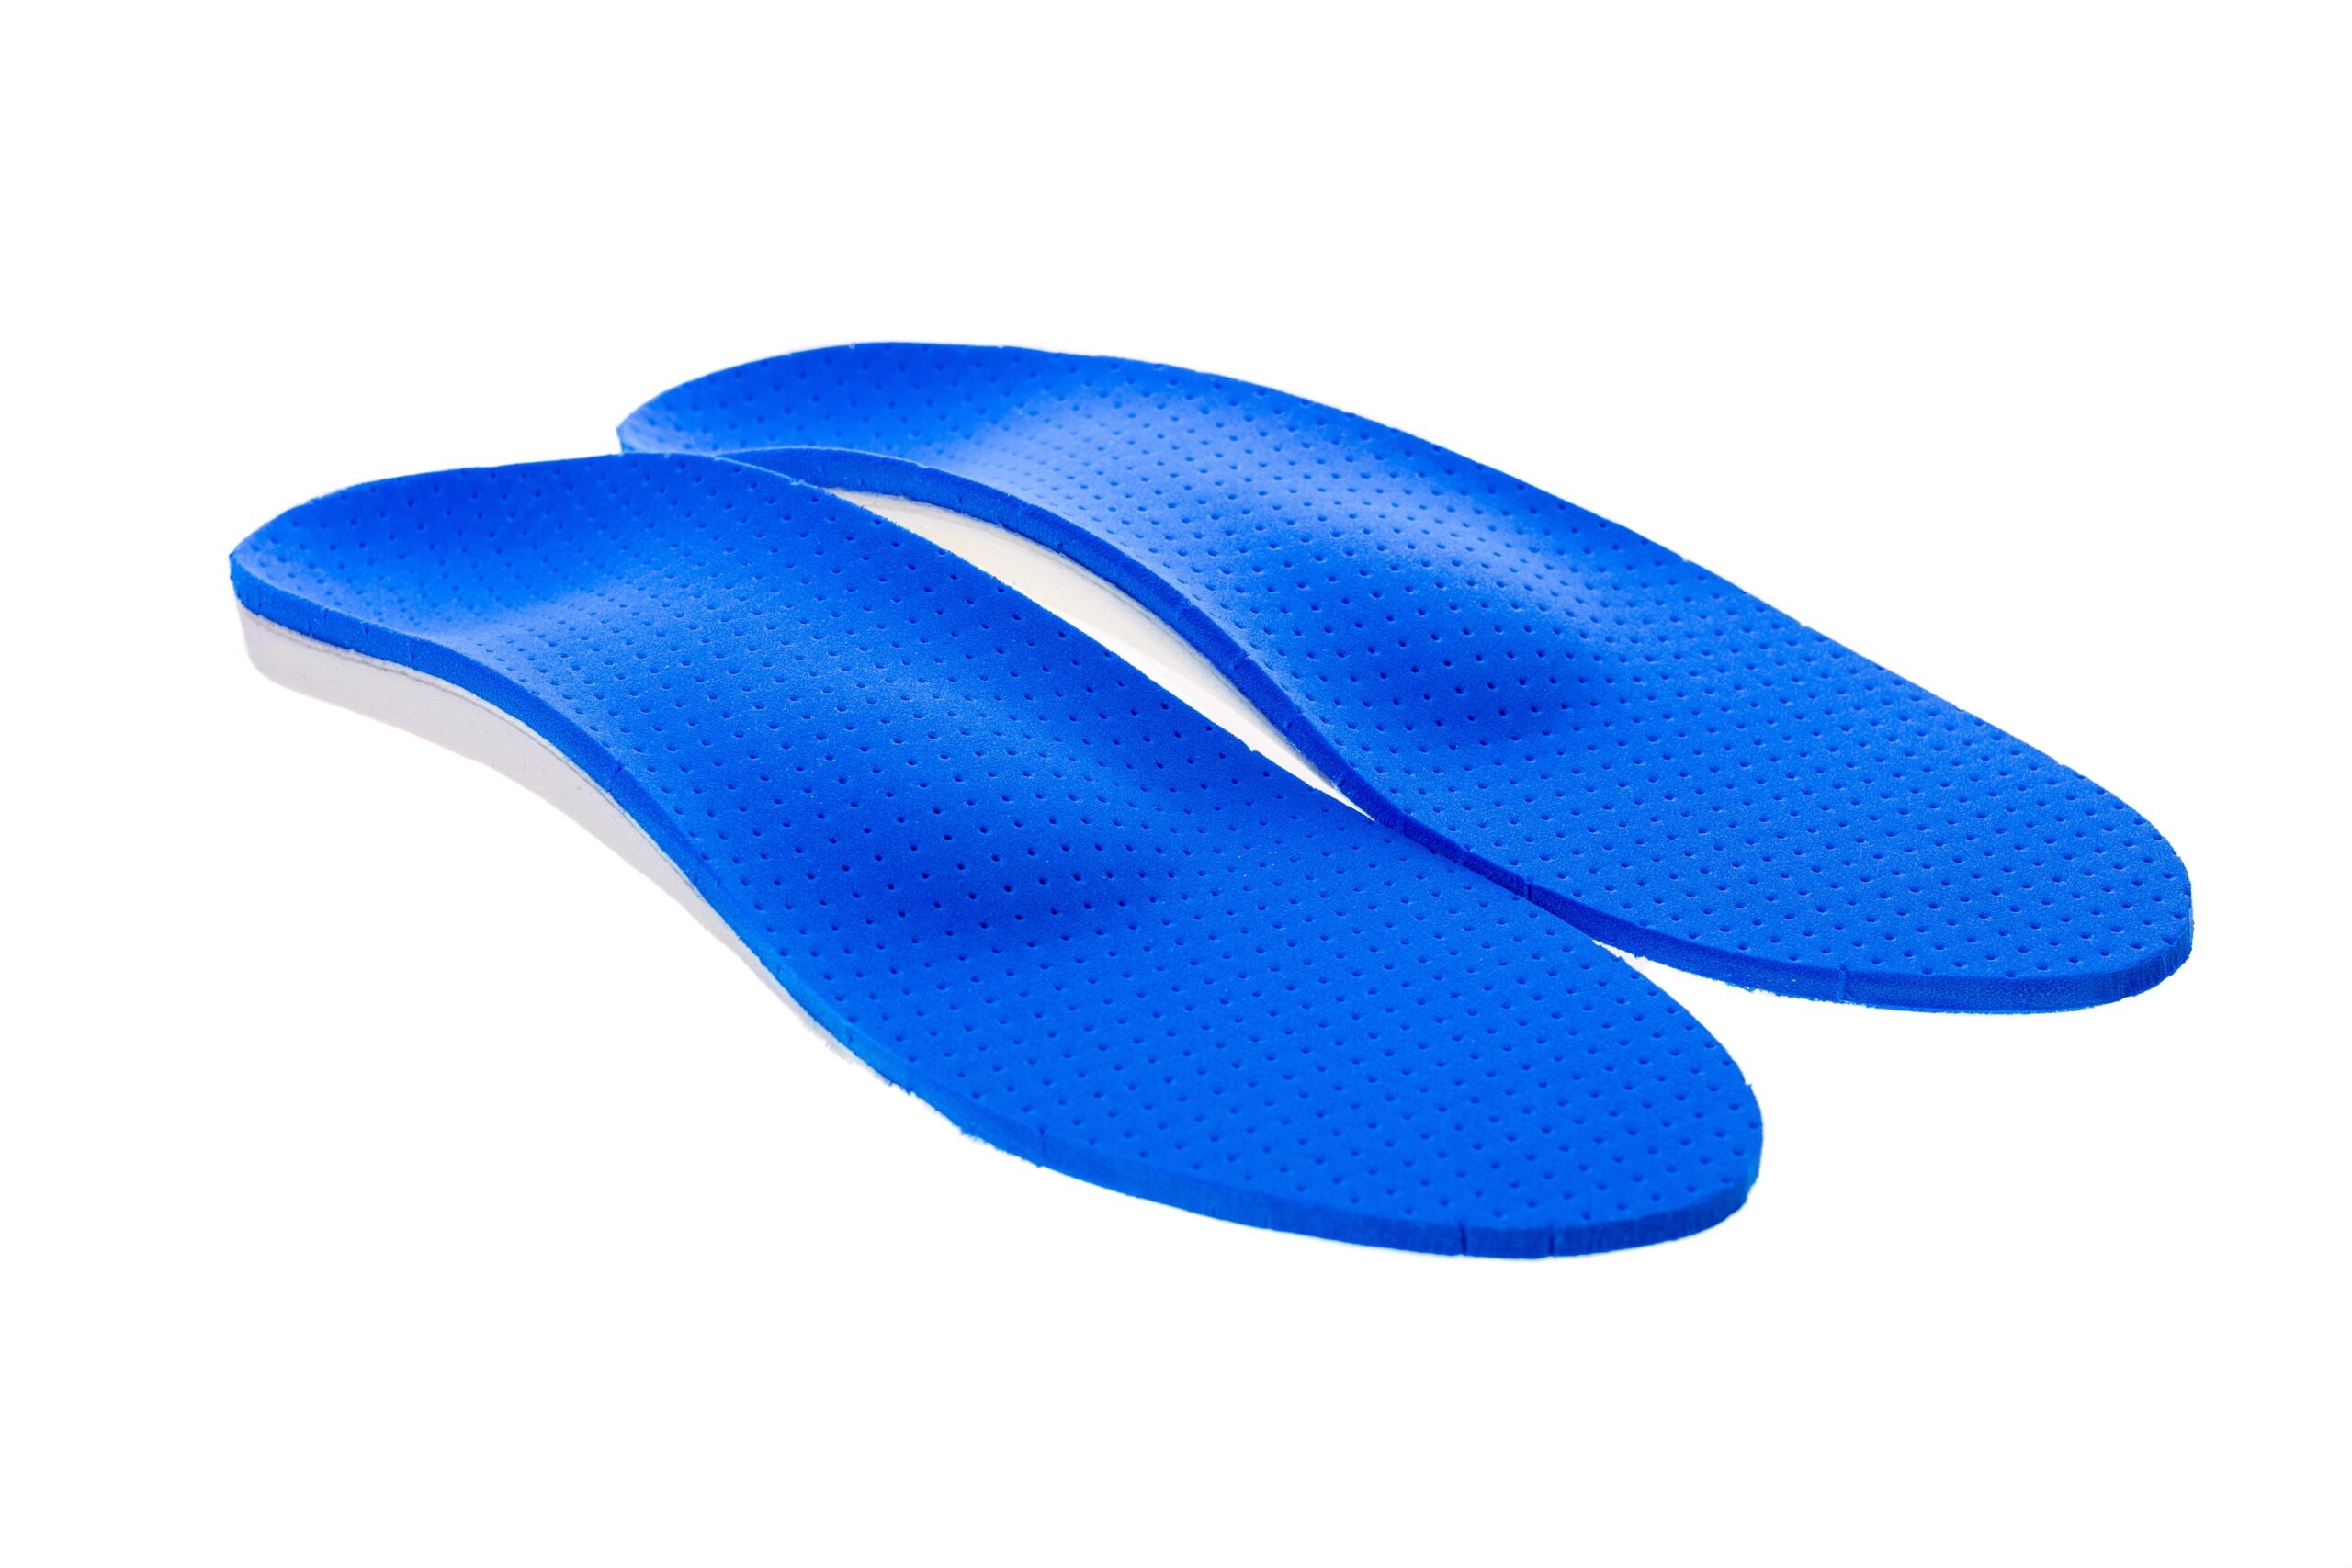
Foot orthoses may be considered if self-management and exercises have not improved your symptoms. Your local MSK podiatrist may prescribe some foot orthoses to wear in your shoes to try and offload the joint.
Ankle brace
An ankle brace may be considered if self-management and exercises have not improved your symptoms. Your local Podiatrist or Orthotist may be able to fit your ankle with an appropriate ankle brace to try and support the joint.
Oral pain medication
Non-steroidal anti-inflammatories medication can sometimes be prescribed by your GP. Please see the pain management section of our foot and ankle pain self-help page for more information.
Corticosteroid injections
Corticosteroid injections although more invasive, can reduce pain and inflammation in the short term, if appropriate they can be provided by your MSK Podiatrist or an appropriately trained professional.
Investigations and surgery
Do I need a scan?
Ankle osteoarthritis can be diagnosed via a physical examination and patient history. X-rays can confirm changes within the joint and indicate severity. MRI and Diagnostic Ultrasound scans can also indicate osteoarthritis as well as confirm active synovitis (inflammation of joint lining).
Will I need surgery?
Surgical management is not usually considered unless you have tried all of the above measures and continue to have difficulty walking. If the severity of the arthritis is significant with minimal scope to improve function then it may be appropriate for a referral to an orthopaedic surgeon to consider a surgical intervention. Surgical options for ankle arthritis may include arthroscopy, ankle fusion or ankle replacement.
Exercises
The exercises below have been provided to help with your ankle osteoarthritis. If there is any doubt about your fitness to do these exercises then please discuss this with your GP.
You may find that these exercises may slightly increase your symptoms initially. However you should find the exercises themselves will become easier to do and that you begin to move your foot and ankle more easily. The exercises can take up to 12 weeks for you to notice a great improvement.
If these exercises cause a large increase in your pain or after 12 weeks there are no noticeable changes in your day to day symptoms then please contact your GP or NHS inform for more advice.
Pain during exercise
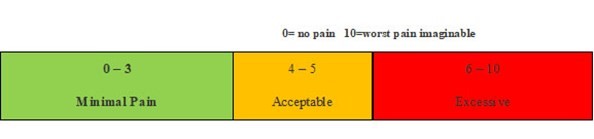
Within the scale, aim to stay in the green or amber boxes. If you are in the red area then you can modify the exercises by:
- reducing the amount of movement during an exercise
- reducing the number of repetitions
- reducing the weights
- reducing your speed
- increasing rest time between sets
Pain after exercise
Your pain or other symptoms should return to your pre-exercise baseline within 30 minutes of exercising. On the morning after your exercises, you should not feel an increase in pain or stiffness that lasts longer than 60 minutes.
Disclaimer
Please note: These exercises should not be used without prior consultation with a medical professional as the use of the wrong exercise may cause additional health related issues and discomfort. NHS Ayrshire & Arran and MSK NHS Ayrshire & Arran are not liable or responsible for any harm, losses or damages whatsoever resulting from the use or misuse of the information contained in or implied by the provided information in each video. These are provided for information only.
If you have any concerns about your ability to perform exercise then please discuss your concerns with your doctor or healthcare provider prior to participating in any advice that is on the MSK NHS Ayrshire & Arran website.
It is recommended to use your ice pack (cryocuff) or cool pack after your exercises to reduce the pain and discomfort this may cause.
Please choose the most relevant exercise section for you.
1. Ankle Rotations
Start by slowly turning your ankle to the left and draw circles with your foot as pain allows.
Repeat this for 20-30 repetitions.
Then slowly turn your ankle to the right and draw circles with your foot as pain allows.
Repeat for 20-30 repetitions.
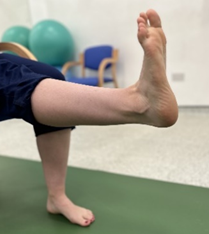
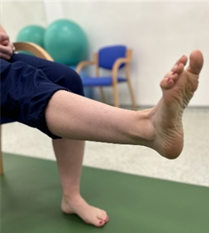
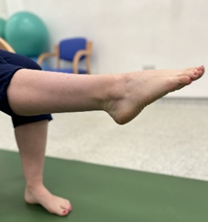
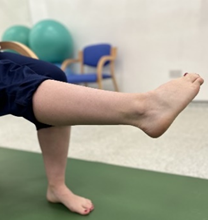
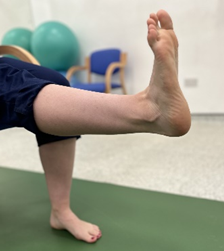
2. Ankle Active Plantarflexion and Dorsiflexion
Start by slowly pointing your toes away from you as pain allows. Then slowly pull your toes back up towards you as pain allows.
Repeat this 20-30 repetitions.

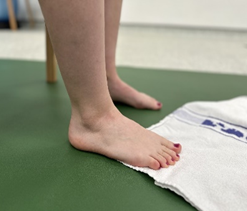
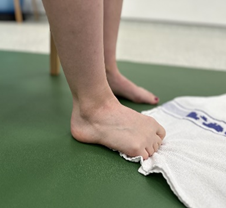
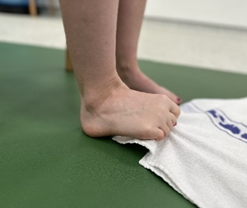
3. Toe Grip Strengthening Exercise with Towel
Place a small towel flat on the ground. Use your toes to begin crunching the towel up with the aim of pulling the towel in towards you, do this in a slow controlled manner whilst maintaining your heel on the ground.
When you have pulled the towel in as far as possible straighten it back out again and repeat the process between 3-5 times to start with.
Aim to build to 3 sets of 15 reps daily.
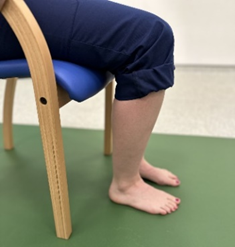
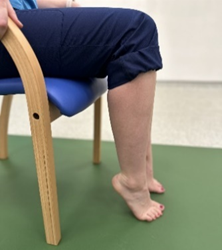
4. Seated Heel Raises
Sitting on a chair, both feet flat on the floor, slowly raise both heels up from the floor so that the weight is going through both balls of your feet.
Hold for 5 seconds and then slowly bring your heels back onto the floor.
Aim to build to 3 sets of 15 reps daily.
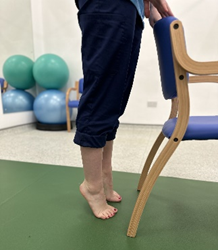
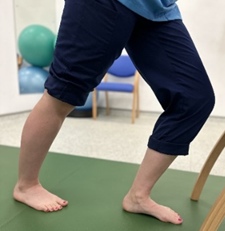
5. Standing Heel Raises
In a standing position, hold onto any wall, chair or kitchen top surface to assist with your balance. Keep your legs straight. Slowly raise both heels up from the floor so that the weight is going through both balls of your feet. Hold for 5 seconds and then slowly bring your heels back onto the floor.
Aim to build to 3 sets of 15 reps daily.

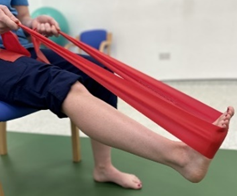
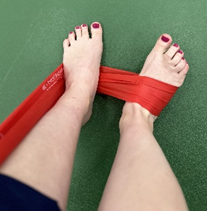
6. Resistance Band – Plantarflexion
Sit on a chair with your affected leg out straight. Using the resistance band under your foot while holding the ends of the band, gently push your foot down as far as you can. Slowly allow the foot to return to starting position.
Aim to build to 3 sets of 15 reps daily.
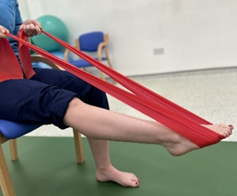
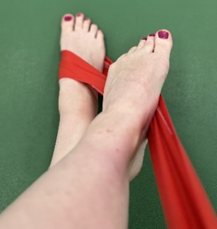
7. Resistance Band – Dorsiflexion
Sit on a chair. Loop the resistance band around the affected foot and stand the other foot on the band next to your affected foot. Using the resistance band over the top of your foot, starting with your foot pointing slightly down, gently pull the foot up towards you as far as you can. Slowly allow the foot to return to the starting position.
Aim to build to 3 sets of 15 reps daily.

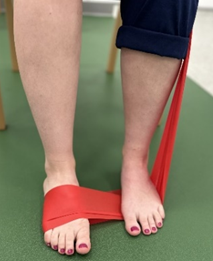
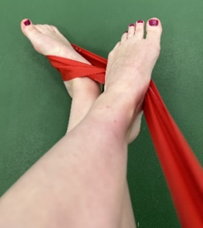
8. Resistance Band- Inversion
Sit on a chair. Loop the resistance band around the affected foot. Cross your other foot over the affected leg, putting tension against the band. Using the resistance band around the inside of the foot, starting with your foot in a relaxed position, gently point in the foot down and in you as far as you can. Slowly allow the foot to return to the starting position.
Aim to build to 3 sets of 15 reps daily.
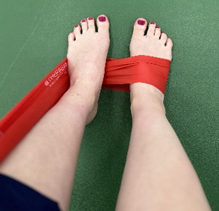
9. Resistance Band – Eversion
Sit on a chair. Loop the resistance band around the affected foot and stand the other foot on the band next to your affected foot. Using the resistance band around the outside of the foot, starting with your foot in a relaxed position, gently point in the foot out you as far as you can. Slowly allow the foot to return to the starting position.
Aim to build to 3 sets of 15 reps daily.
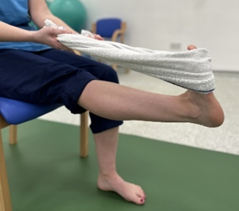
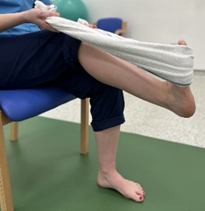
10. Seated Towel Calf Stretch – Knee Straight
Place a towel around the ball of the affected foot and avoid bending your knee. Pull the towel toward you until you feel the stretch in the bottom of your foot and back of your calf muscle.
Hold the stretch for 30 seconds and repeat 3 times.

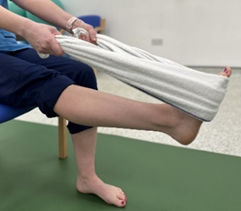
11. Seated Towel Calf Stretch – Knee Bent
Place a towel around the ball of the affected foot and bend your knee. Pull the towel toward you until you feel the stretch in the bottom of your foot and back of your calf muscle.
Hold the stretch for 30 seconds and repeat 3 times.
12. Standing Calf Stretch – Knee Straight
Place your hands on a wall for support and take a step back with the affected foot. Now begin to bend the knee of your front leg whilst moving your chest towards the wall until you feel a stretch in the back of you calf muscle.
Hold for 30 seconds and repeat 3 times.
13. Standing Calf Stretch – Knee Flexed
Adopt the same starting position as you did for the previous exercise. Slide the affected foot towards the front foot as demonstrated. This time when bending the front knee, also bend the knee of the back leg until you feel a stretch deeper in the calf muscle.
Hold this for 30 seconds and repeat 3 times.

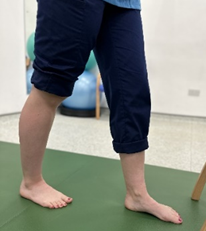
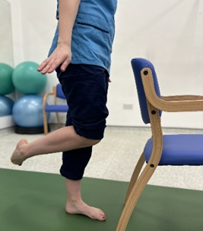
14. Single Leg Balance
Stand on a flat surface with your feet shoulder-width apart. Have a chair or wall nearby for support if you need it. Stand on one leg and lift your other foot off the ground. Hold this position. Repeat on other foot.
Try and aim for 60 seconds.
Repeat 3 times daily
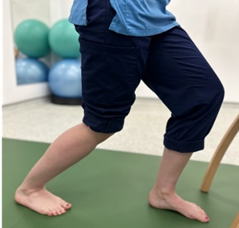
15. Heel-to-Toe Walk Exercise
Clear the space around you to avoid tripping hazards. Have a wall nearby for support if you need it. Keep your eyes facing forwards and not looking at your feet. Pretend you’re walking on a tightrope by placing one foot directly in front of the other. Ensure you place or heel down first. Continue walking in this pattern for 3-4 meters, turn and repeat. Repeat 3- 5 times daily.